Chocolate-Dipped Pretzel Rods for Holiday Parties
Looking for a holiday treat that looks fancy, tastes amazing, and doesn’t require you to spend half your day covered in flour? Say hello to chocolate-dipped pretzel rods! These sweet-and-salty goodies are basically little edible Christmas decorations, and the best part? You don’t need to be a professional baker to make them. Not even close.
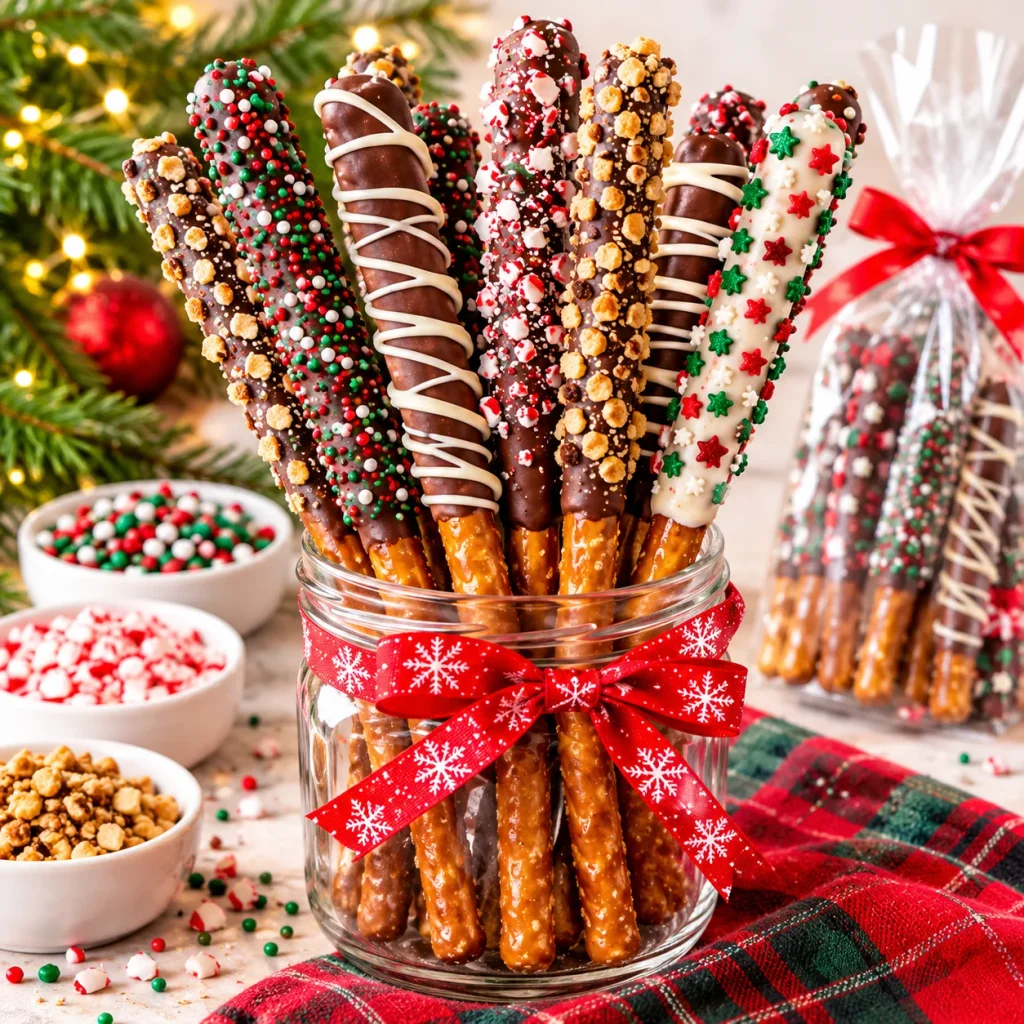
Imagine crunchy pretzel rods coated in smooth, melted chocolate, then covered with colorful sprinkles, crushed candy canes, or whatever festive toppings your heart desires. They’re sweet, salty, crunchy, and ridiculously addictive. Seriously, making a batch for a holiday party is risky because you’ll probably eat half before anyone arrives.
Whether you’re hosting a Christmas party, preparing edible gifts, or just looking for a fun kitchen activity, these chocolate-dipped pretzel rods are an absolute winner. Let’s make some!
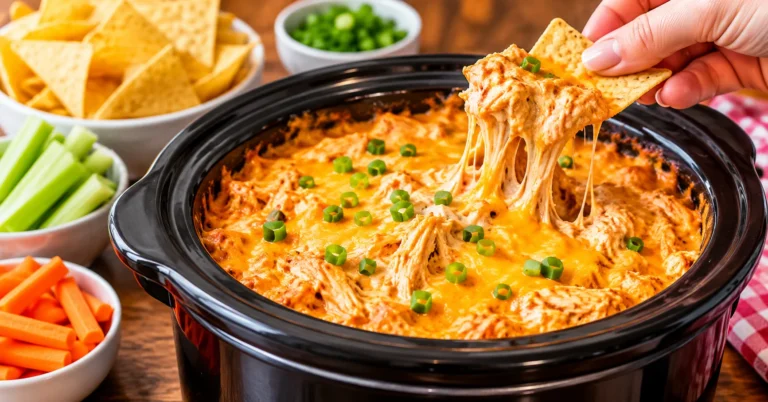
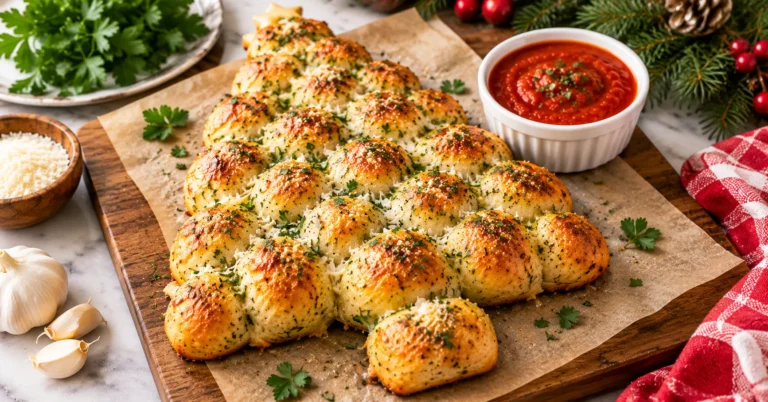
If you’re planning a festive holiday gathering, serve these chocolate-dipped pretzel rods alongside our Christmas Tree Pull-Apart Bread for a party spread that has both sweet and savory treats covered.
Why You’ll Love These Chocolate-Dipped Pretzel Rods
There are plenty of reasons to add these chocolate-covered treats to your holiday dessert lineup. Here are a few of my favorites.
- Super easy to make: No oven, complicated techniques, or mysterious baking equipment required. Just melt, dip, decorate, and chill.
- Perfect sweet-and-salty combination: The crunchy pretzels balance the rich chocolate beautifully. It’s the kind of snack that makes you reach for just one more. And then another.
- Completely customizable: Use Christmas sprinkles, crushed peppermint candies, chopped nuts, or colorful candy pieces. There’s no wrong way to decorate these.
- Great for gifting: Wrap a few rods in clear cellophane bags, tie them with festive ribbons, and suddenly you’ve got adorable homemade holiday gifts.
- Party-friendly: They’re easy to grab, don’t require plates or forks, and look lovely on a holiday dessert table.
Honestly, these pretzel rods are proof that you don’t need an elaborate recipe to make something impressive. Sometimes the simplest treats steal the show!

Ingredients You’ll Need
The ingredient list is refreshingly short. You might already have most of these hiding in your pantry.
For the pretzel rods:
- 12–16 large pretzel rods: Choose sturdy rods that aren’t broken. Nobody wants a chocolate-dipping disaster halfway through.
- 12 ounces semi-sweet chocolate chips or melting wafers: These create that rich chocolate coating. Melting wafers are especially convenient because they melt smoothly.
- 4 ounces white chocolate chips or melting wafers: Optional, but perfect for adding decorative drizzles and creating a pretty contrast.
- 1 teaspoon coconut oil or vegetable shortening: Optional, but it helps loosen the chocolate and create a smoother coating.
For the toppings:
- Holiday sprinkles: Red, green, white, gold, or whatever festive colors make you happy.
- Crushed candy canes: Add a refreshing peppermint crunch.
- Mini chocolate candies: Because more chocolate is rarely a bad decision.
- Chopped nuts: Almonds, pecans, or peanuts add extra crunch.
- Toffee bits: For a buttery, caramel-like flavor.
- Colored sugar: Adds sparkle without requiring any decorating skills.
Quick tip: Prepare all your toppings before melting the chocolate. Once you dip a pretzel rod, you’ll want to decorate it immediately before the chocolate starts setting.
Step-by-Step Instructions
Ready to turn a handful of simple ingredients into a seriously cute holiday snack? Let’s do this!
Step 1: Prepare Your Workspace
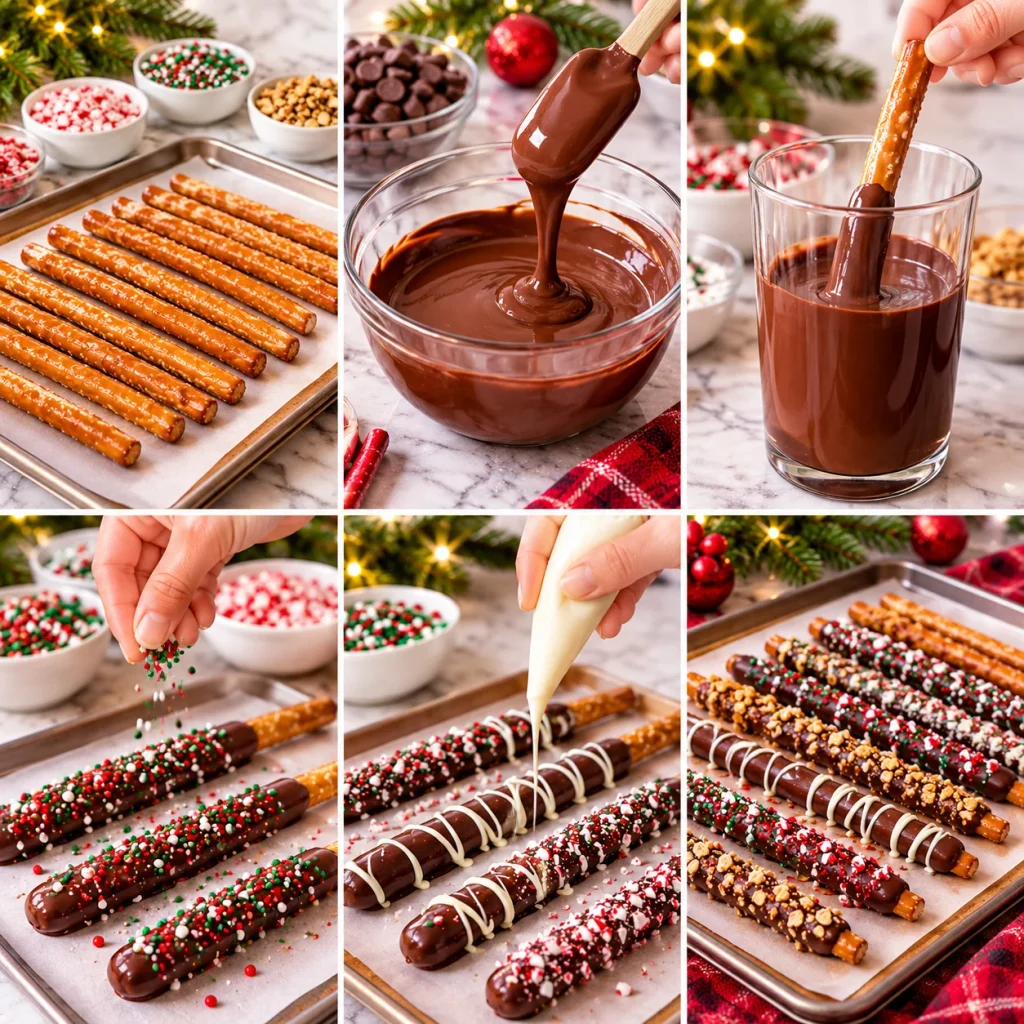
Line a large baking sheet with parchment paper or a silicone baking mat. This gives your chocolate-dipped pretzel rods a clean place to set without sticking.
Arrange your sprinkles, crushed candy canes, nuts, and other toppings in small bowls. Trust me, getting everything ready now saves you from scrambling around with chocolate-covered fingers later.
Step 2: Melt the Chocolate
Place your semi-sweet chocolate chips or melting wafers in a microwave-safe bowl.
Microwave in 20–30-second intervals, stirring between each round until the chocolate becomes smooth and completely melted. For more tips on melting chocolate without scorching or ruining its texture, check out this helpful guide to melting chocolate from King Arthur Baking. Don’t overheat it! Chocolate can burn surprisingly quickly, and burnt chocolate is nobody’s holiday miracle.
If the chocolate feels too thick, stir in a little coconut oil or vegetable shortening.
Step 3: Dip the Pretzel Rods
Pour the melted chocolate into a tall, narrow glass or container. This makes dipping much easier and helps you coat the pretzels evenly.
Hold a pretzel rod by one end and dip it into the chocolate, covering about two-thirds of the rod. Gently rotate it to coat all sides, then lift it out and let the excess chocolate drip back into the container.
Leave a small section uncovered so everyone has a convenient handle.
Step 4: Add Your Favorite Toppings
While the chocolate is still wet, sprinkle your favorite toppings over the coated portion.
Try crushed candy canes for a peppermint twist, colorful sprinkles for a festive look, or chopped nuts for extra crunch. You can also mix and match toppings to create several different flavors in one batch.
Important: Work quickly because chocolate begins to set faster than you might expect.
Step 5: Make Them Extra Fancy With Chocolate Drizzle
Want your pretzel rods to look like something from an expensive holiday candy shop? Here’s your chance.
Melt the white chocolate using the same microwave method. Transfer it to a piping bag or a small zip-top bag with one tiny corner snipped off.
Drizzle the white chocolate over the pretzel rods in zigzag patterns. You can also use melted dark chocolate over white-coated pretzels for a pretty contrast.
Step 6: Let Them Set
Carefully arrange the decorated pretzel rods on your prepared baking sheet.
Allow them to sit at room temperature until the chocolate hardens. If you’re impatient (understandable), place the tray in the refrigerator for about 15–20 minutes.
Once the chocolate sets completely, your pretzel rods are ready to serve, package, or sneak into the kitchen for a quick taste test.
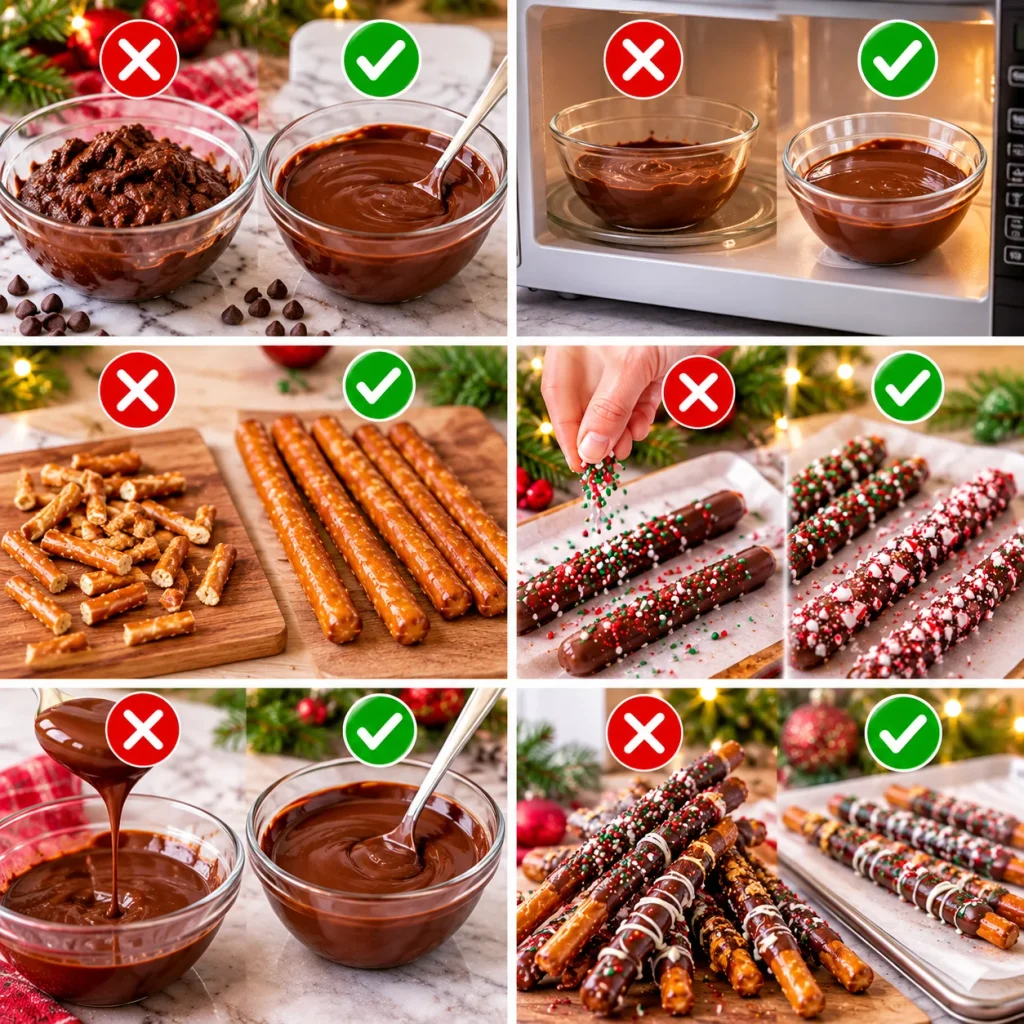
Common Mistakes to Avoid
These treats are easy, but a few little mistakes can make the process unnecessarily frustrating. Let’s avoid those, shall we?
- Using the wrong chocolate: Regular chocolate chips can sometimes melt into a thick consistency. Add a little coconut oil or use melting wafers for easier dipping.
- Overheating the chocolate: High heat can scorch chocolate and make it grainy. Always microwave in short intervals and stir frequently.
- Dipping broken pretzels: Check your pretzel rods before dipping. Broken pieces are harder to handle and can create a messy coating situation.
- Adding toppings too late: Sprinkles won’t stick to chocolate that’s already hardened. Decorate each rod immediately after dipping.
- Using too much oil: A little helps smooth the chocolate, but too much can make the coating thin and runny.
- Stacking them before they set: Give your pretzel rods enough time to harden. Otherwise, you’ll end up with one giant chocolate-covered pretzel sculpture. Not exactly the look we’re going for.

Alternatives & Substitutions
One of the best things about this recipe is how easy it is to customize. You can change the chocolate, toppings, and decorations depending on what you have available.
Try different chocolate varieties:
- Milk chocolate: Perfect if you prefer a sweeter, creamier coating.
- Dark chocolate: Great for balancing the salty pretzels with a richer, less sweet flavor.
- White chocolate: Creates a beautiful snowy appearance and pairs wonderfully with peppermint.
- Butterscotch chips: A fun alternative with a buttery, caramel-like flavor. Use melting wafers if you want an easier coating.
Switch up the toppings:
- Use crushed Oreos for a cookies-and-cream version.
- Add toasted coconut for a tropical twist.
- Sprinkle chopped pistachios over white chocolate for a festive green color.
- Try mini M&M-style candies for extra color and crunch.
- Add crushed toffee or caramel bits for a sweeter finish.
Make them allergy-friendly: Choose pretzels and chocolate that meet your dietary requirements. For nut allergies, skip the nuts and check ingredient labels for cross-contact warnings.
IMO, the best combination is semi-sweet chocolate, crushed candy canes, and a little white chocolate drizzle. It’s simple, festive, and tastes like Christmas decided to become a snack.
Frequently Asked Questions (FAQ)
1. Can I make chocolate-dipped pretzel rods ahead of time?
Absolutely! These are actually great make-ahead treats. Prepare them up to 1–2 weeks in advance, then store them in an airtight container in a cool, dry place. Just keep them away from heat and humidity.
2. How do I keep the chocolate from sliding off the pretzels?
Make sure your pretzel rods are completely dry before dipping. Use chocolate with a smooth but slightly thick consistency, and let excess chocolate drip off before adding toppings. A little patience goes a long way!
3. Do I need to refrigerate chocolate-covered pretzel rods?
Not necessarily. They can set at room temperature if your kitchen is cool. Refrigeration works when you’re in a hurry, but avoid storing them in the fridge long-term because condensation can affect the chocolate.
4. Can I use regular chocolate chips instead of melting wafers?
Of course! Semi-sweet, milk, and white chocolate chips all work. Add a small amount of coconut oil if needed to improve the consistency. Melting wafers are simply more convenient for dipping.
5. How should I store leftover pretzel rods?
Place them in an airtight container and keep them in a cool, dry spot away from direct sunlight. Separate layers with parchment paper to prevent sticking and protect those pretty decorations.
6. Can I freeze chocolate-dipped pretzel rods?
You can, but I wouldn’t make it my first choice. Freezing can introduce condensation when you thaw them, which may affect the chocolate’s appearance and texture. They’re best enjoyed fresh or stored in a cool, dry place.
7. How can I package these pretzel rods as holiday gifts?
Place two or three rods in a clear cellophane bag, secure the top with a festive ribbon, and add a cute holiday gift tag. You can also arrange them in a decorative tin lined with parchment paper. Homemade gifts don’t get much easier!
Final Thoughts
And there you have it! Chocolate-Dipped Pretzel Rods that look adorable, taste incredible, and require surprisingly little effort.
Whether you decorate them with crushed candy canes, colorful holiday sprinkles, chopped nuts, or fancy chocolate drizzles, these treats are guaranteed to bring a little extra fun to your holiday celebrations.
They’re perfect for Christmas parties, cookie exchanges, edible gifts, school celebrations, or those random evenings when you suddenly decide you need something sweet.
The best part? You can get creative without worrying about making every pretzel look perfect. A little messy chocolate drizzle just adds character, right?
So grab your pretzels, melt some chocolate, and start decorating. And remember to make a few extra because these sweet-and-salty treats have a mysterious habit of disappearing before the party even starts.
Happy dipping and happy holidays! ❤️