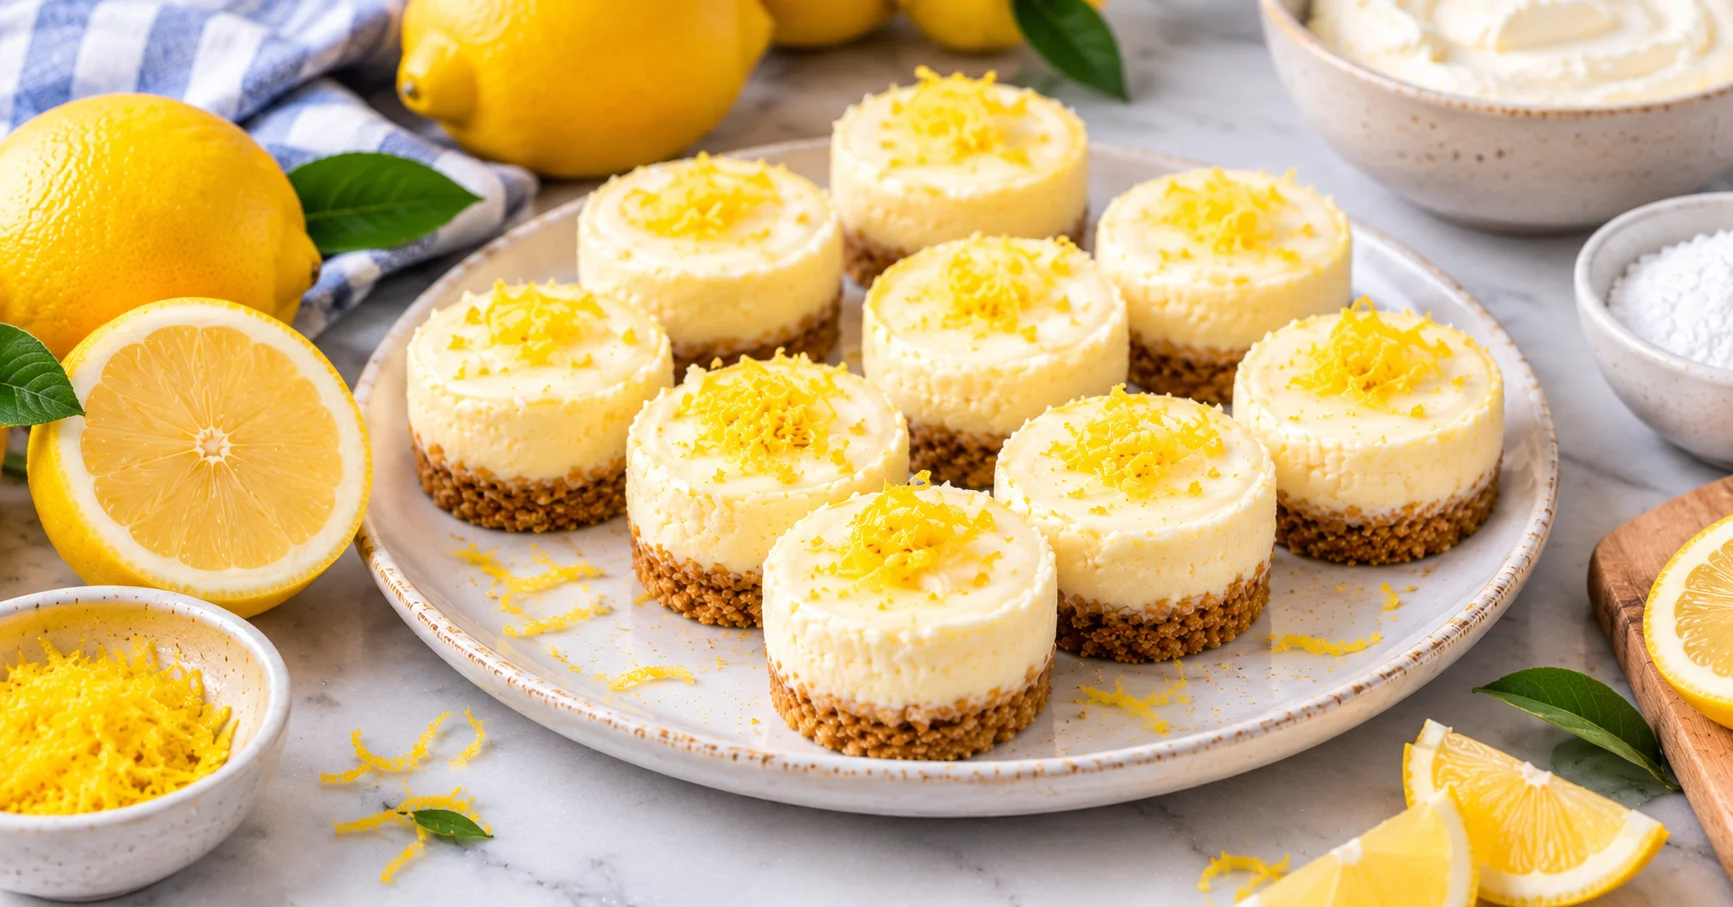
Keto Lemon Cheesecake Bites: Easy, Creamy & Sugar-Free!
Ever wish cheesecake came in tiny, pop-it-in-your-mouth bites so you could enjoy dessert without committing to an entire slice? Well, meet your new favorite treat: Keto Lemon Cheesecake Bites! 🍋
These little beauties deliver everything you love about classic cheesecake: a rich, creamy texture, a bright lemony kick, and just the right amount of sweetness. The best part? They’re low in carbs, contain no added sugar when made with a suitable sugar-free sweetener, and fit beautifully into a keto lifestyle.
They’re perfect for afternoon cravings, after-dinner treats, or those moments when you open the fridge for the fifth time hoping something delicious has magically appeared. Spoiler alert: now it can.
Even better, you don’t need complicated techniques, fancy equipment, or a culinary degree to make them. Just a handful of ingredients, a little mixing, and some patience while they chill. Let’s make dessert happen!
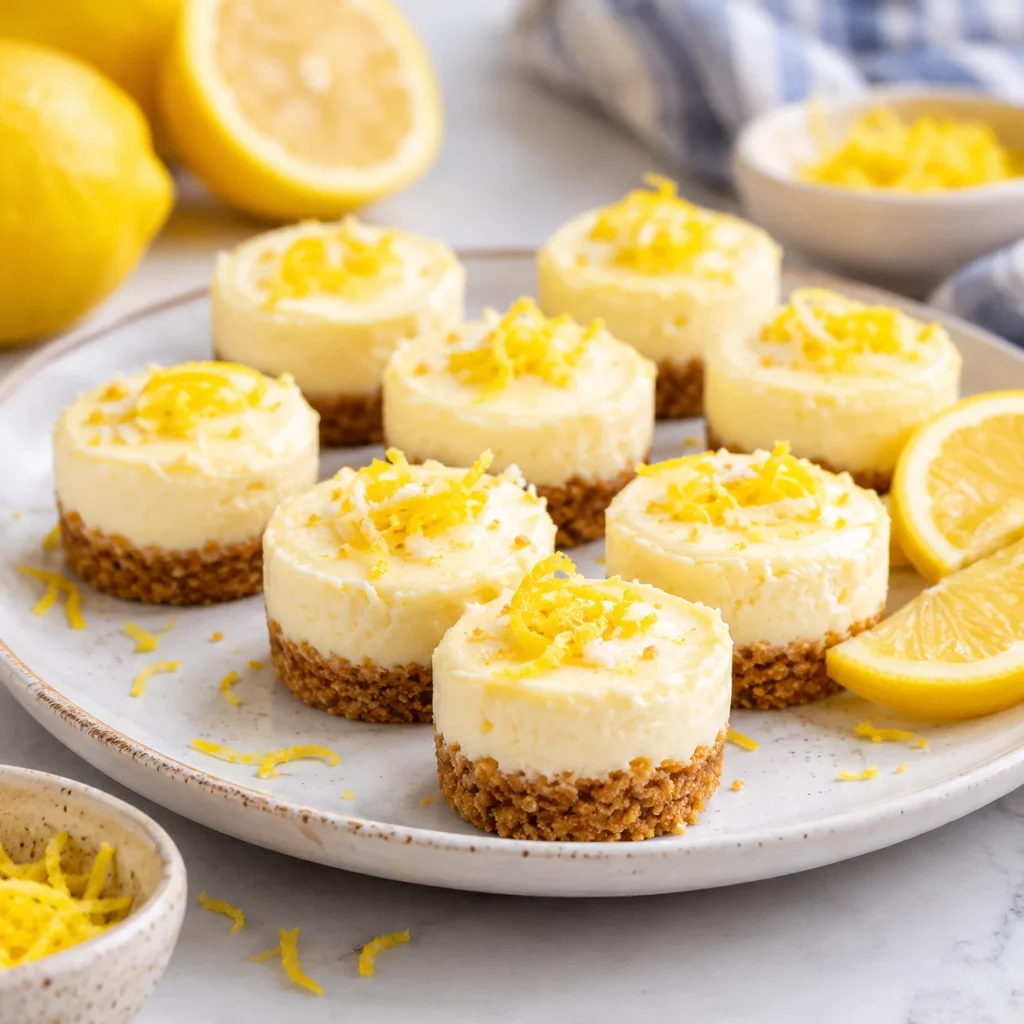
Why You’ll Love These Keto Lemon Cheesecake Bites
There are plenty of reasons to fall for these mini cheesecakes, but let’s start with the obvious: they taste like actual dessert, not a sad compromise.
- Bright and refreshing: Fresh lemon juice and zest give these bites a lovely citrus flavor that balances the richness of cream cheese.
- Perfectly portioned: Their bite-sized shape makes them easy to serve at parties, pack for snacks, or grab whenever a sweet craving strikes.
- Keto-friendly ingredients: Almond flour, full-fat cream cheese, and a low-carb sweetener help keep the carbohydrates low.
- Simple to prepare: You don’t need a water bath or any complicated cheesecake wizardry.
- Make-ahead magic: Prepare them ahead of time and refrigerate until you’re ready to enjoy them.
- Easy to customize: Prefer extra lemon? Go for it. Want a little vanilla? Absolutely. These bites are wonderfully flexible.
IMO, the lemon is what makes this recipe special. Cream cheese provides that rich, tangy foundation, while lemon adds freshness that keeps every bite from feeling too heavy.
And because they’re small, you can serve them at gatherings without slicing a whole cheesecake while everyone watches impatiently.
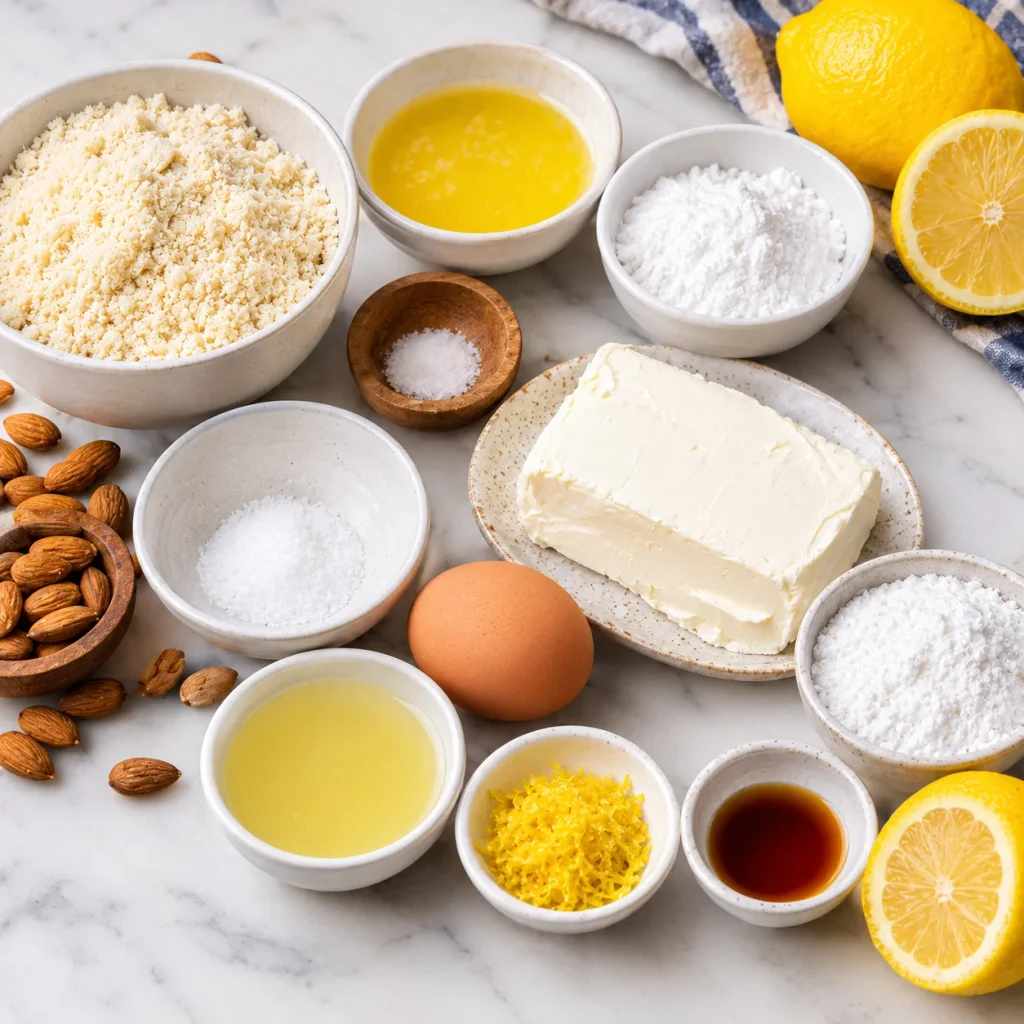
Ingredients You’ll Need
This recipe makes approximately 18–20 mini cheesecake bites, depending on the size of your portions.
For the almond flour crust
- 1 cup almond flour: Creates a tender, slightly nutty crust without traditional wheat flour.
- 2 tablespoons unsalted butter, melted: Helps bind the crust and adds buttery flavor.
- 1 tablespoon powdered keto-friendly sweetener: Adds a little sweetness to the base.
- Pinch of salt: Brings everything together. Tiny ingredient, surprisingly useful job.
For the lemon cheesecake filling
- 8 ounces full-fat cream cheese, softened: The star of the show. Use block-style cream cheese for a thick, creamy filling.
- ¼ cup powdered erythritol or another suitable keto sweetener: Adjust to taste, depending on how sweet you like your cheesecake.
- 1 large egg: Helps the filling set during baking.
- 2 tablespoons fresh lemon juice: Gives the cheesecake its signature citrus zing.
- 1 tablespoon finely grated lemon zest: Adds fragrant lemon flavor without introducing too much extra liquid.
- ½ teaspoon vanilla extract: Softens the tangy lemon flavor with a hint of warmth.
A quick ingredient tip: Choose a powdered sweetener rather than a coarse granulated one for a smoother filling. Also, check the sweetener’s label for carbohydrate content and serving size, since different products vary.
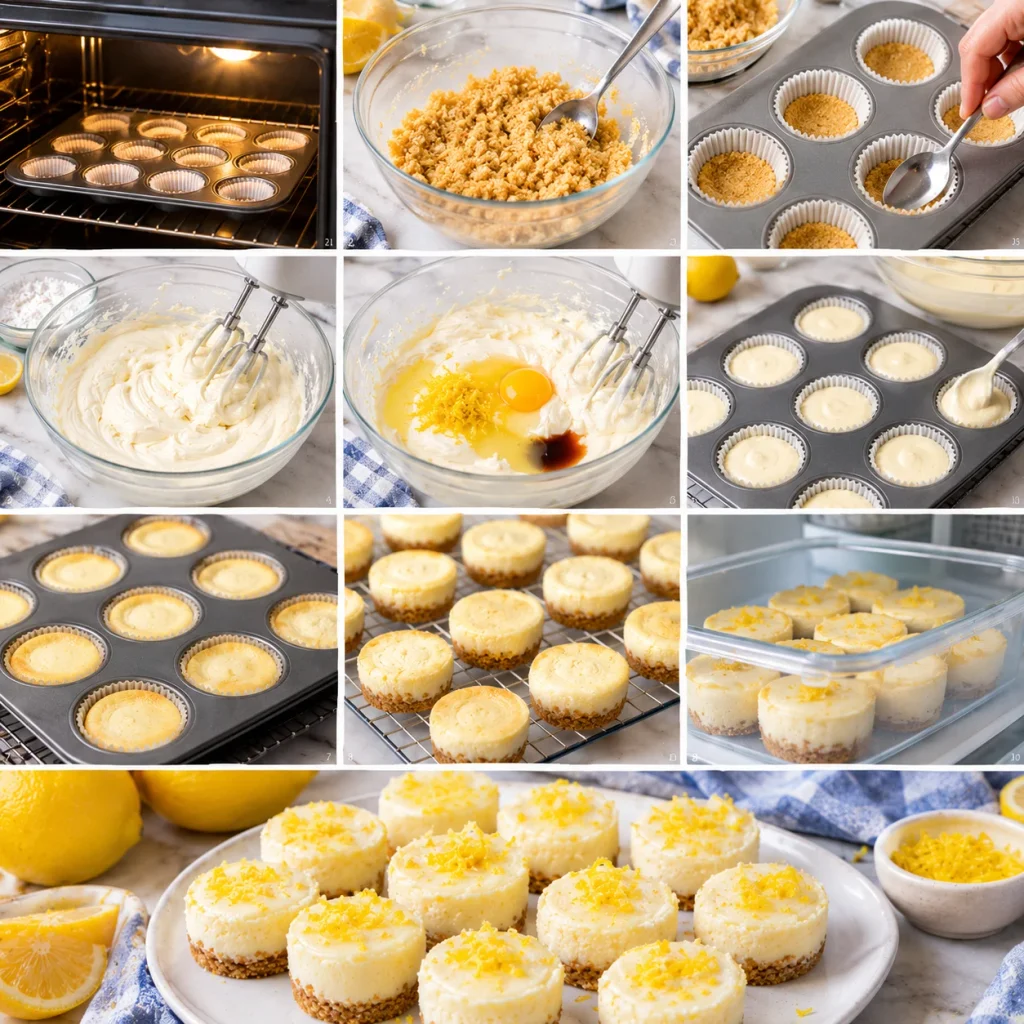
Step-by-Step Instructions
Prep time: 15 minutes · Bake time: 15–20 minutes · Chill time: 2–3 hours · Makes: 18–20 bites
Step 1: Preheat the oven
Preheat your oven to 325°F (165°C). Line a mini muffin pan with small paper liners, or lightly grease the wells to prevent sticking.
Getting the oven ready first means you won’t be standing around with cheesecake filling in your bowl wondering why nothing is happening.
Step 2: Make the almond flour crust
In a small bowl, combine the almond flour, melted butter, powdered sweetener, and salt. Stir until the mixture resembles damp sand and holds together when pressed.
Spoon approximately 1–2 teaspoons into each prepared muffin well. Press the mixture firmly into the bottom using the back of a small spoon. A compact crust holds together better than a loose, crumbly one.
Step 3: Mix the cheesecake filling
In a mixing bowl, beat the softened cream cheese and powdered sweetener until smooth and creamy. Add the egg, lemon juice, lemon zest, and vanilla extract.
Mix on low speed until everything combines evenly. Scrape down the sides of the bowl to catch any sneaky cream cheese lumps hiding out of sight.
Don’t overmix once you’ve added the egg. We want a smooth cheesecake, not an enthusiastic science experiment.
Step 4: Fill the muffin cups
Spoon the cheesecake mixture over the prepared crusts, filling each cup about three-quarters full. Gently tap the pan against the counter to release any large air bubbles.
Try to distribute the filling evenly so the bites bake at roughly the same rate. Nobody wants one perfectly creamy cheesecake and another that’s auditioning to become a lemon-flavored hockey puck.
Step 5: Bake until set
Place the pan in the preheated oven and bake for 15–20 minutes, checking toward the end of the baking time.
The edges should look set, while the centers may still have a slight jiggle. Avoid waiting until the centers become completely firm, because the bites will continue to set as they cool. If your mini muffin wells are particularly small, start checking early.
Step 6: Cool completely
Remove the pan from the oven and let the bites cool in the pan for about 15–20 minutes. Then carefully transfer them to a cooling rack if needed.
Don’t rush this part. Warm cheesecake is delicate, and trying to remove it too soon can turn your beautiful little desserts into a delicious pile of crumbs.
Step 7: Chill and enjoy
Transfer the cooled bites to an airtight container and refrigerate for at least 2–3 hours, or until thoroughly chilled and firm. Looking for more chilled treats that don’t require much oven time? Explore these easy no-bake fall desserts for more sweet inspiration.
Once they’re ready, garnish with a little extra lemon zest if you like. Serve cold and enjoy that creamy, citrusy goodness.
Congratulations! You’ve just made a batch of cheesecake bites that look fancy enough for guests but are easy enough for an ordinary Tuesday.
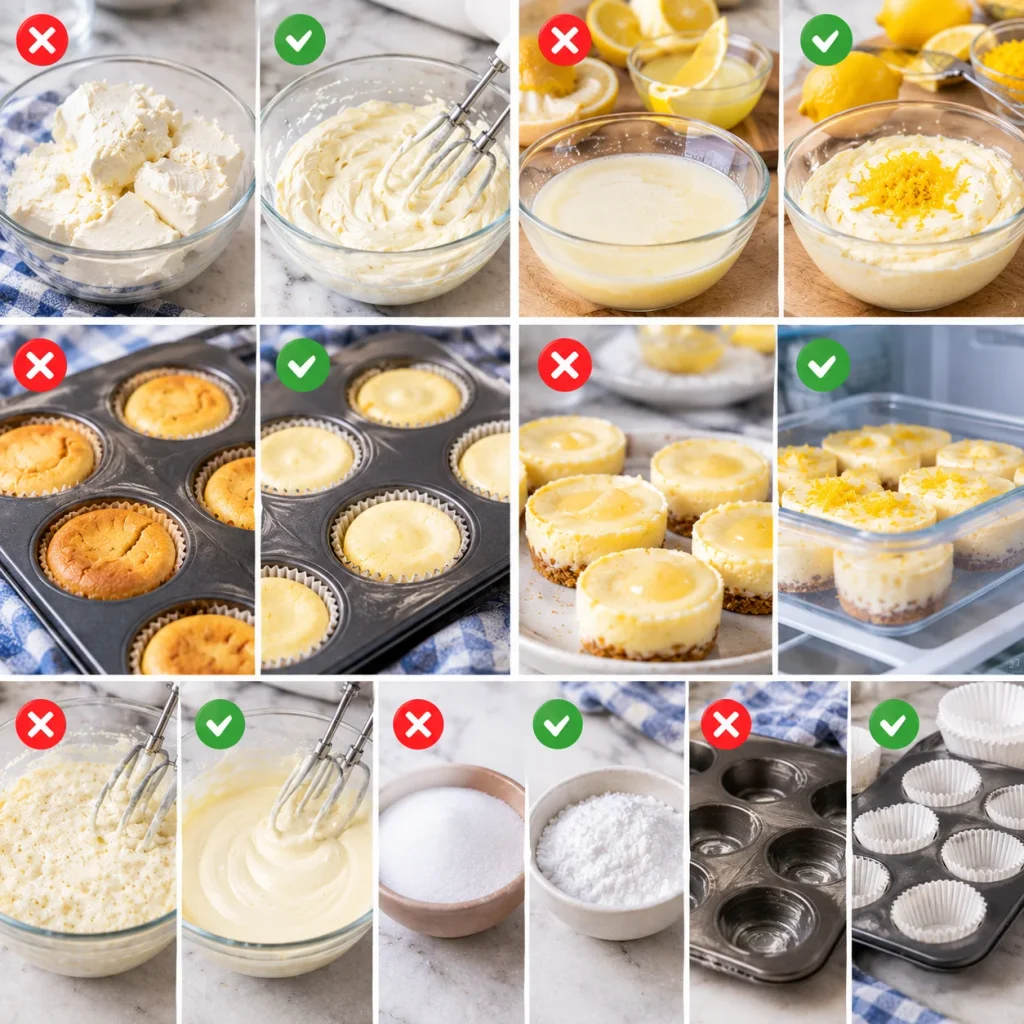
Common Mistakes to Avoid
Even a simple recipe has a few potential troublemakers. Here’s how to keep your lemon cheesecake bites on the right track.
- Using cold cream cheese: Cold cream cheese creates lumps that are difficult to beat out. Let it soften at room temperature before mixing.
- Adding too much lemon juice: More lemon juice doesn’t automatically mean more flavor. Too much liquid can affect the filling’s texture, so use lemon zest when you want a stronger citrus punch.
- Overbaking the bites: If you wait for the centers to become completely firm in the oven, your cheesecake may turn dry. A slight center jiggle is your friend.
- Skipping the chilling time: Yes, they smell amazing. No, that doesn’t mean they’re ready. Chilling helps the filling firm up and improves the texture.
- Overmixing the filling: Excessive mixing can incorporate too much air, which may contribute to puffing and cracking.
- Using the wrong sweetener: Some sweeteners have a cooling aftertaste or behave differently in recipes. Choose one designed for baking and adjust according to its sweetness.
- Forgetting the liners: You can grease the pan instead, but liners make removal and cleanup much easier. Future you will appreciate the effort.
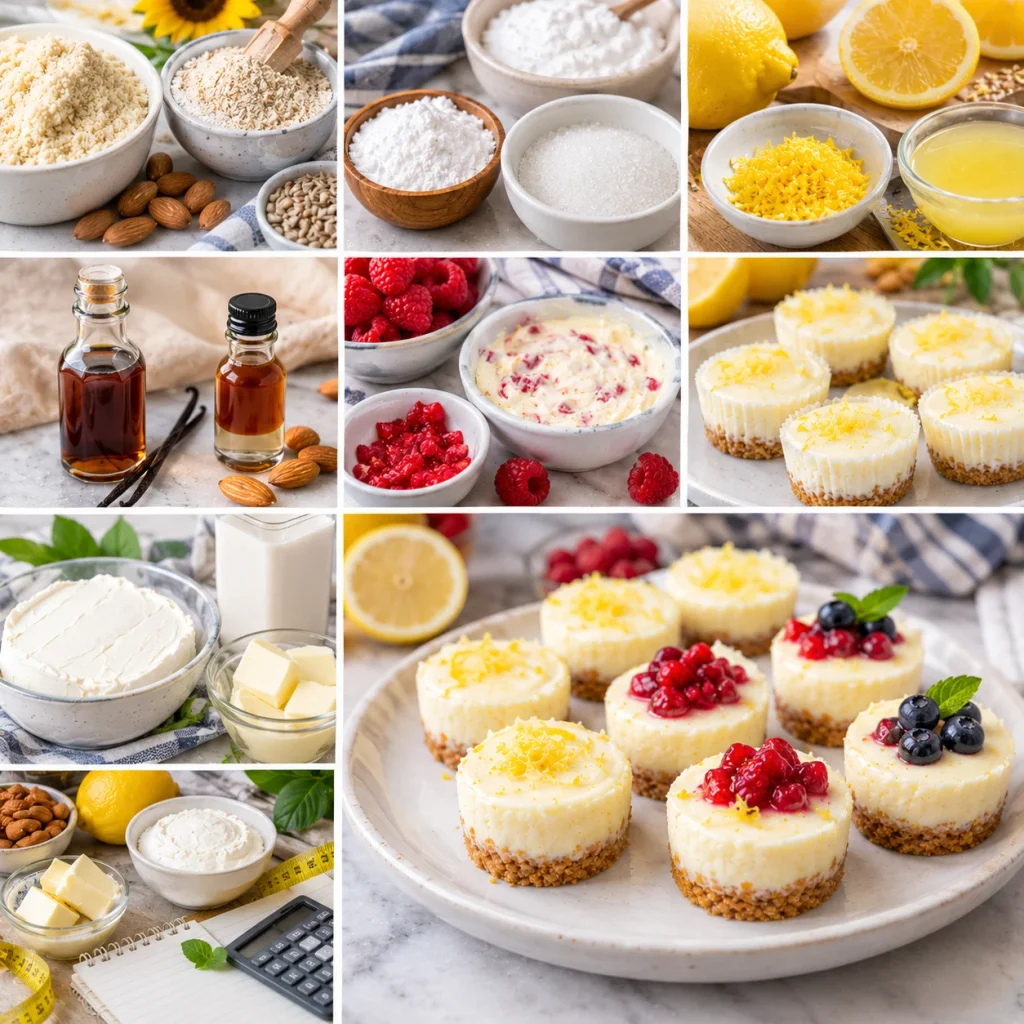
Alternatives & Substitutions
Want to experiment a little? These cheesecake bites are easy to adapt without completely changing the recipe.
- Almond flour alternative: Finely ground sunflower seed flour can work as a nut-free option. It may produce a slightly different flavor and texture, so test a small batch first.
- Sweetener swaps: Powdered allulose or a powdered erythritol-based blend can work. Sweetness and baking behavior vary, so follow the product’s conversion guidance.
- Extra lemon flavor: Add a little more finely grated zest instead of pouring in extra juice. You’ll get a stronger lemon aroma without unnecessarily thinning the filling.
- Vanilla variation: Replace vanilla with a tiny splash of almond extract for a different flavor profile. Use it sparingly; almond extract has a big personality.
- Berry twist: Add a few finely chopped fresh raspberries to the filling or serve the bites with a couple of berries on top. Keep portions modest if you’re tracking carbohydrates.
- No crust: Prefer a crustless version? Skip the almond flour base and grease the muffin wells well. The bites will have a softer, more cheesecake-like texture throughout.
- Dairy-free option: Dairy-free cream cheese and plant-based butter may work, but the results depend heavily on the products. The texture may be softer, and you’ll need to check labels carefully.
One important note: keto-friendly doesn’t automatically mean carbohydrate-free. Almond flour, dairy, lemon juice, and sweeteners can all contribute carbohydrates. If you’re following a strict keto plan, calculate the nutrition using the exact ingredients and serving sizes you use.
Want to estimate the nutrition for your own batch? Use USDA FoodData Central to look up nutrition information for individual ingredients.
FAQ (Frequently Asked Questions)
1. Can I make these keto lemon cheesecake bites ahead of time?
Absolutely! They’re actually ideal for making ahead. Prepare them a day before serving and keep them refrigerated in an airtight container. The flavors have time to settle, and the chilled texture becomes wonderfully creamy.
2. Do I really need to use fresh lemons?
Fresh lemons are your best bet because both the juice and zest contribute bright, natural flavor. Bottled lemon juice can work in a pinch, but you’ll miss some of that fragrant zestiness. When life gives you lemons, zest them before squeezing them!
3. How should I store leftover cheesecake bites?
Store them in an airtight container in the refrigerator for up to 5 days, provided they’ve been handled and refrigerated properly. Keep them chilled between servings, and don’t leave them sitting at room temperature for extended periods.
4. Can I freeze these cheesecake bites?
Yes! Arrange the fully chilled bites in a single layer until firm, then transfer them to a freezer-safe container. Freeze for up to 2 months for best quality. Thaw them in the refrigerator before serving.
5. Are these cheesecake bites suitable for a keto diet?
They can fit into a keto diet because they use almond flour and a low-carb sweetener instead of traditional flour and sugar. However, the exact net carbohydrate count depends on your ingredients and portion size. Calculate the nutrition for your own batch rather than relying on a generic estimate.
6. Why did my cheesecake bites crack?
Cracks can happen if the bites bake too long, incorporate too much air during mixing, or cool too quickly. The good news? Tiny cracks won’t affect the flavor. Add a little lemon zest on top and let everyone admire your very intentional rustic design.
7. Can I make these without a mini muffin pan?
You can use a standard muffin pan with larger liners, but the bites will be bigger and may need additional baking time. Check for set edges and a slightly jiggly center rather than following the original timing blindly.
Final Thoughts
These Keto Lemon Cheesecake Bites prove that a low-carb dessert can be creamy, refreshing, and seriously satisfying without requiring a dozen complicated ingredients.
With their buttery almond flour crust, smooth cheesecake filling, and bright lemon flavor, they’re perfect for meal prep, weekend baking, holiday dessert trays, or simply treating yourself after a long day.
Make a batch, let them chill, and keep a few in the fridge for when that inevitable sweet craving shows up. You can dress them up with lemon zest, add a few berries, or enjoy them exactly as they are.
And here’s the real beauty of bite-sized cheesecake: you can serve them to friends, bring them to a party, or quietly enjoy one while standing in front of the refrigerator with the door open.
No judgment here.
Now grab those lemons and get baking! Your future self and your dessert-loving taste buds will thank you.